First, I’d like to thank Jerry for his post Use Binary Ninja with ChatGPT Desktop App - the first steps are literally the same. If you already have a domain, it’ll be free for you. If like me, you don’t; it’ll cost you less than $0.85.
Architecture#
- ChatGPT (web or desktop app)
- Binary Ninja with Binary Ninja MCP plugin
- Cloudflare Tunnel (
cloudflared) - A domain
Why Cloudflare Tunnel?#
ChatGPT can only talk to a remote MCP server if that server is publicly reachable over HTTPS. A FastMCP instance running on your machine (for example on localhost:8050) is typically not reachable from the Internet because it sits behind NAT, a consumer router, or a corporate firewall. Cloudflare Tunnel solves this by letting a small agent (cloudflared) on the machine create outbound-only connections to Cloudflare’s edge, so traffic reaches your local service without exposing a publicly routable IP address or opening inbound ports on your router.
Operationally, Cloudflare Tunnel gives you a stable HTTPS endpoint (for example https://mcp.yourdomain.tld) that Cloudflare terminates at the edge and then forwards through the tunnel to your local origin (for example http://127.0.0.1:8050). Because the tunnel is outbound, it usually only requires allowing egress connectivity from your machine to Cloudflare (Cloudflare documents the relevant egress requirements, including port 7844 for QUIC/HTTP2).
In addition to connectivity, using Cloudflare as the front door enables edge security controls that are difficult to do safely on a home network, such as applying WAF rules and enforcing an IP allowlist (e.g., only permitting OpenAI/ChatGPT egress IP ranges) before traffic ever reaches the machine running FastMCP.
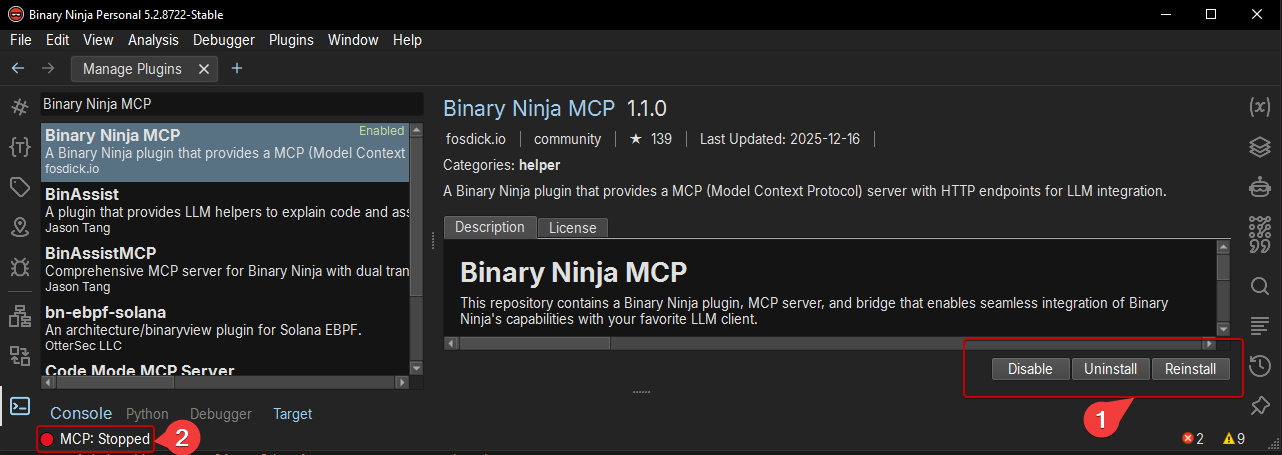
Installing Binary Ninja MCP plugin#
In Binary Ninja:
- Open
Manage Plugins - Search for
Binary Ninja MCPby fosdickio - Install the plugin
- Run the plugin (click on “MCP: Stopped”)
Setting up bridge environment#
- Install uv (Python package and project manager) if it’s not already installed
powershell -ExecutionPolicy ByPass -c "irm https://astral.sh/uv/install.ps1 | iex"
- Install plugin’s requirements
cd "$HOME\AppData\Roaming\Binary Ninja\repositories\community\plugins\fosdickio_binary_ninja_mcp"
uv init
uv add -r .\requirements.txt
Converting the bridge to a FastMCP HTTP server#
As Jerry said, the original bridge script only supports stdio as an MCP transport, but ChatGPT expects an HTTP-based MCP endpoint. To fix that, we’ll switch it to FastMCP with streamable-http transport.
- Install FastMCP package
uv add fastmcp
- Update imports in
$HOME\AppData\Roaming\Binary Ninja\repositories\community\plugins\fosdickio_binary_ninja_mcp\bridge\binja_mcp_bridge.py
# Change
from mcp.server.fastmcp import FastMCP  # line 12

# to
from fastmcp import FastMCP
- Make it use HTTP transport instead of
stdio
# Change in "if __name__ == "__main__":" block
mcp.run() # line 865

# to
mcp.run(transport="streamable-http", port=8050)  # or any port you prefer
This will expose the MCP server over HTTP on 127.0.0.1:8050.
- Start the bridge
cd "$HOME\AppData\Roaming\Binary Ninja\repositories\community\plugins\fosdickio_binary_ninja_mcp\bridge"
.\.venv\Scripts\activate

python .\binja_mcp_bridge.py
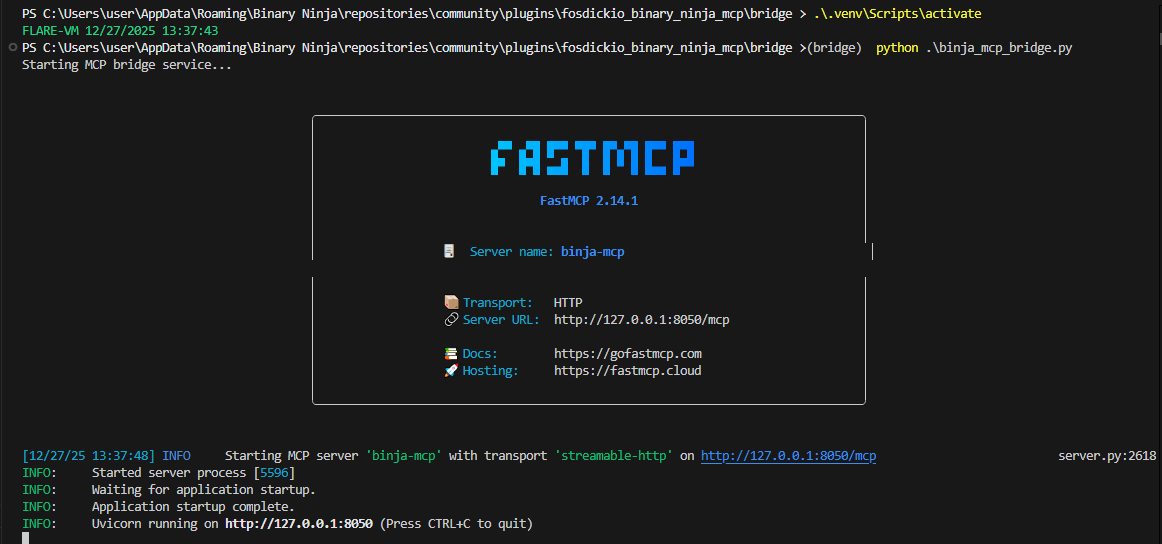
Note that you will have to relaunch it every time you want to use the MCP server.
Setting up a domain & Cloudflare Tunnel#
Domain#
If you already have a domain you can skip this part.
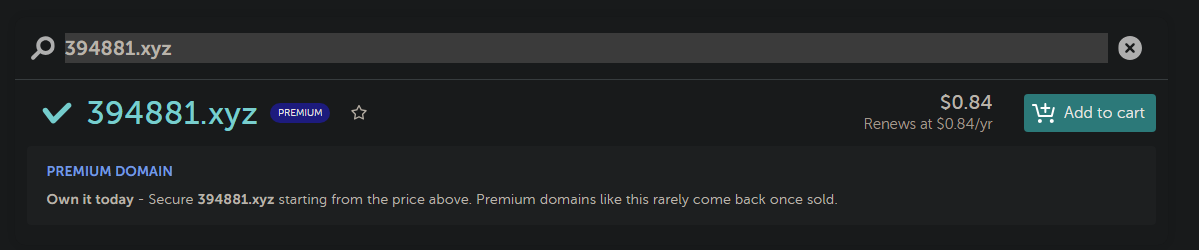
To pay only $0.85 per year for a domain (with Whois privacy) you can buy the cheap [6to9-digit.xyz] (cf. 1.111B Class .xyz domains) like this one on Namecheap:
- Add to cart & pay
- Check your spam to verify your account (important or it’ll just stay in “pending” status)
- Verify DNSSEC is disabled
Cloudflare Tunnel#
- Create an account here CloudFlare One & verify your email or you’ll get stuck (check spam)
- Go to Account home
- Select Onboard a domain
- Enter your domain apex domain (
domain.tld) and select Continue - Select the free plan
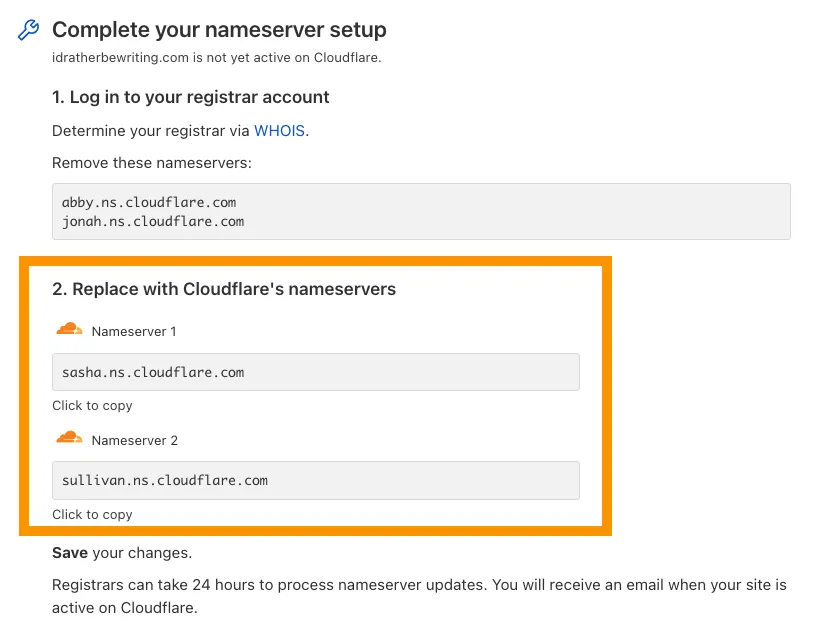
- On Namecheap update your Nameservers with “Custom DNS” and put Cloudflare’s ones
- Wait (and force update) until it’s “active” on Cloudflare
Next step is:
- Get back on CloudFlare One
- Go to Networks > Connectors > Cloudflare Tunnels
- Select Create a tunnel
- Choose Cloudflared for the connector type and select Next
- Enter a name like “MCP” and save
- Install
cloudflaredon your machine but don’t run it! - Authenticate (if you didn’t verify your email you’ll get stuck here)
cloudflared login
- Create a tunnel
cloudflared tunnel create <tunnel-name>
- Configure the tunnel to route
mcp.yourdomain.tldtohttp://127.0.0.1:8050
mkdir -p "C:\Windows\System32\config\systemprofile\.cloudflared"

# Copy cert.pem & tunnel-id.json (edit the ID) files in the directoru
cp "$HOME\.cloudflared\tunnel-ID.json" "C:\Windows\System32\config\systemprofile\.cloudflared"

cp "$HOME\.cloudflared\cert.pem" "C:\Windows\System32\config\systemprofile\.cloudflared"
- Create
config.ymlfile hereC:\Windows\System32\config\systemprofile\.cloudflared\config.yml(edit tunnel UUID & hostname)
tunnel: <TUNNEL-UUID>
credentials-file: C:\Windows\System32\config\systemprofile\.cloudflared\<TUNNEL-UUID>.json

ingress:
  - hostname: mcp.yourdomain.tld
    service: http://127.0.0.1:8050
  - service: http_status:404

logfile: C:\Cloudflared\cloudflared.log
- Create a DNS route to the tunnel
cloudflared tunnel route dns <tunnel-name> mcp.yourdomain.tld
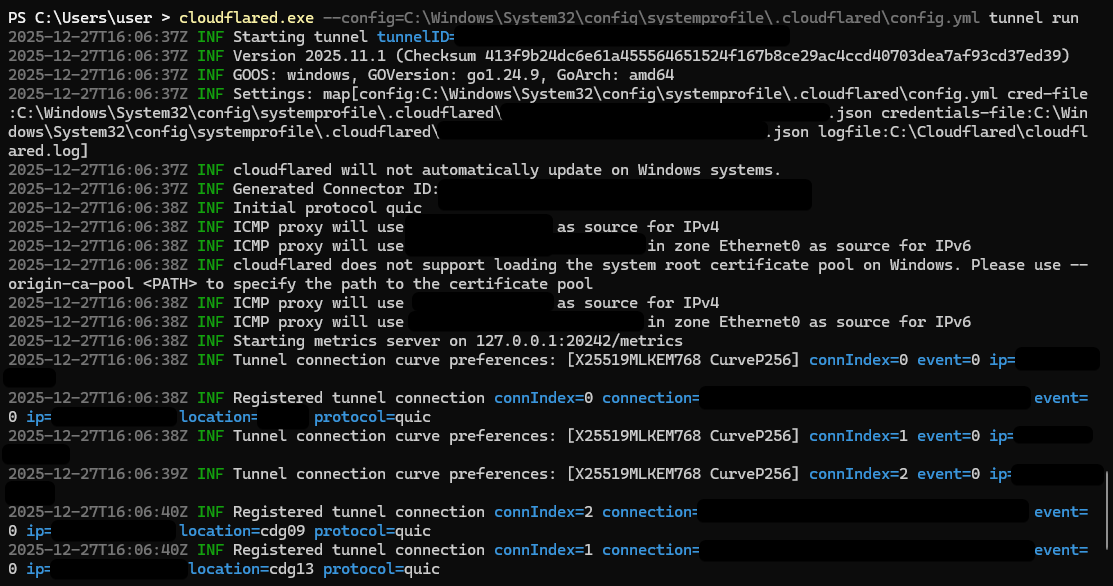
- Start the tunnel
cloudflared.exe --config=C:\Windows\System32\config\systemprofile\.cloudflared\config.yml tunnel run
Note that you could either create a service to run this everytime or have to run this command every time you want to use your ChatGPT connector.
Improve security#
For this we’ll block everything BUT ChatGPT egress IP. In fact, OpenAI write in its documentation that it’s the only method for now:
A frequent question is how your MCP server can confirm that a request actually comes from ChatGPT. Today the only reliable control is network-level filtering, such as allowlisting ChatGPT’s published egress IP ranges.
- Get the IP here https://openai.com/chatgpt-connectors.json
- Convert to CSV
- Create an “IP list” on Cloudflare
- Go to Settings
- Go to Lists
- Select Create a new list
- For Content type, select IP
- Paste all IP from the CSV
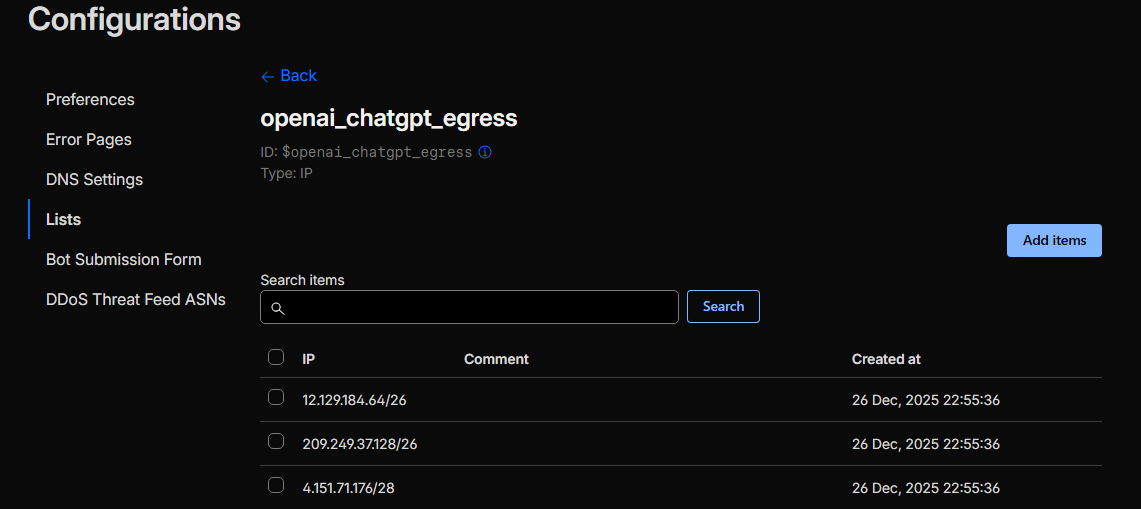
- Create a WAF rule “Block non-allowed list”
(http.host eq "mcp.yourdomain.tld" and not ip.src in $openai_chatgpt_egress)
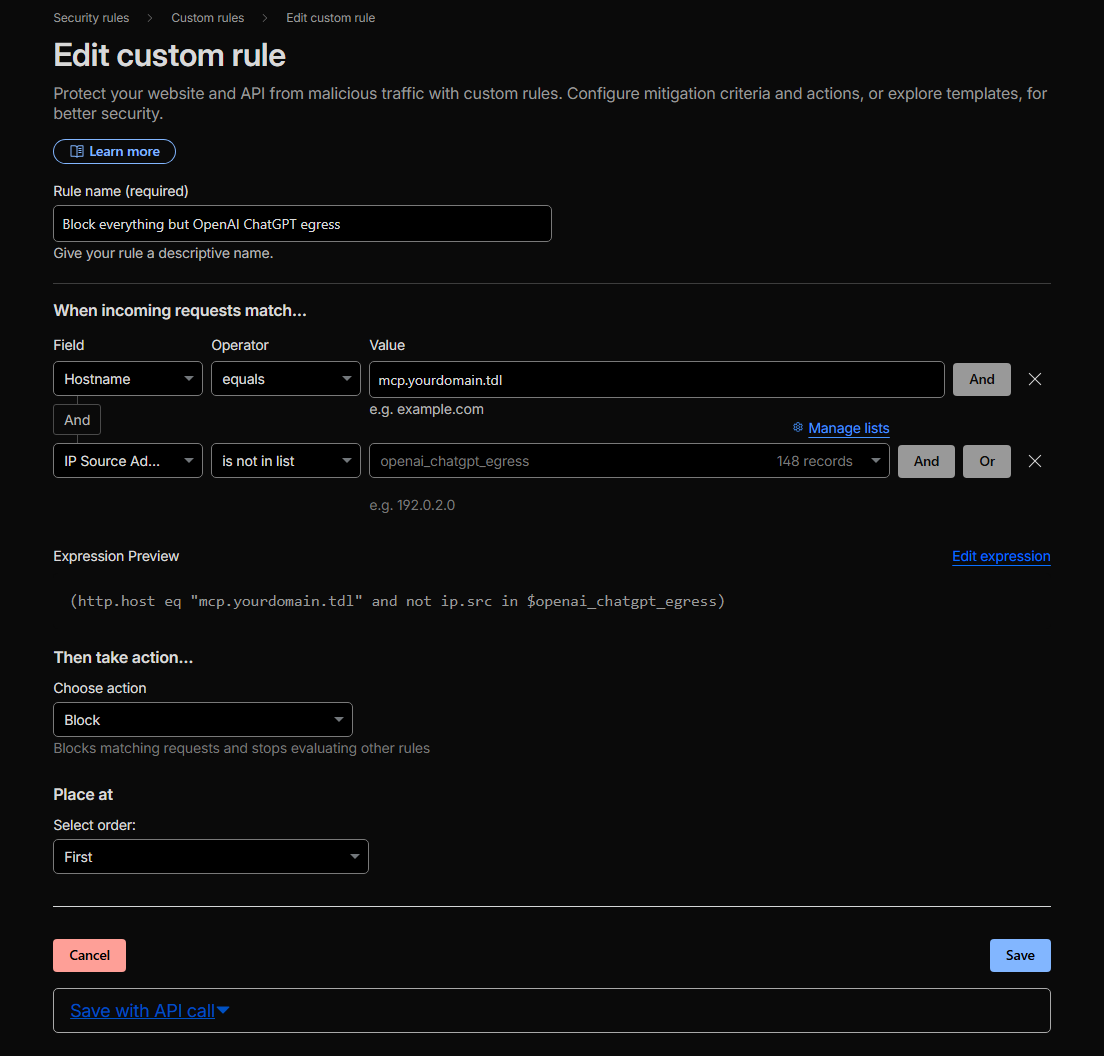
chatgpt-connectors.json list and review the field “creationTime”Creating custom ChatGPT connector#
Now you should have:
.\binja_mcp_bridge.py(FastMCP bridge service) running
cd "$HOME\AppData\Roaming\Binary Ninja\repositories\community\plugins\fosdickio_binary_ninja_mcp\bridge"
.\.venv\Scripts\activate
python .\binja_mcp_bridge.py
- Cloudflare tunnel running
cloudflared.exe --config=C:\Windows\System32\config\systemprofile\.cloudflared\config.yml tunnel run
To create your ChatGPT custom connector:
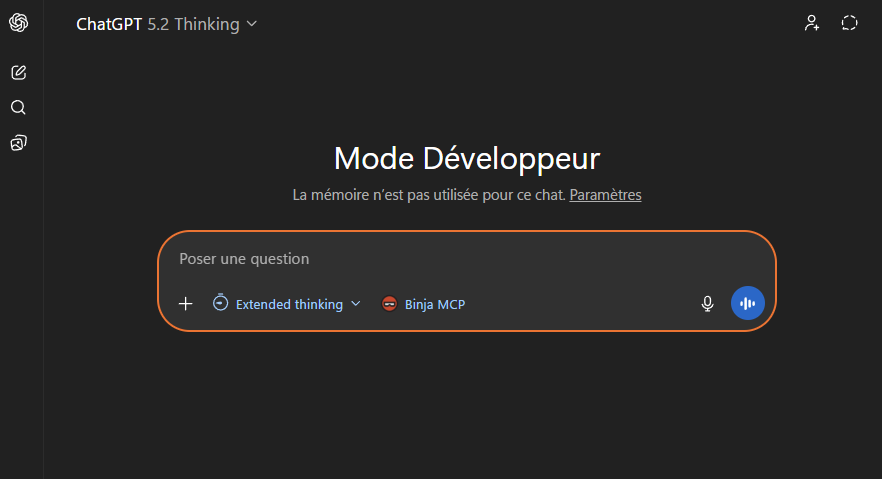
- Go to ChatGPT Web or Desktop App
- Go to Settings → Connectors → Advanced settings
- Enable Developer Mode
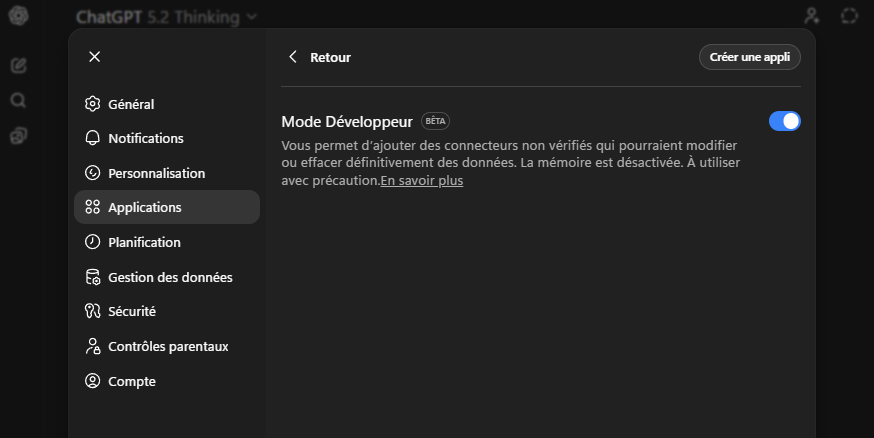
- Click Back and then Create
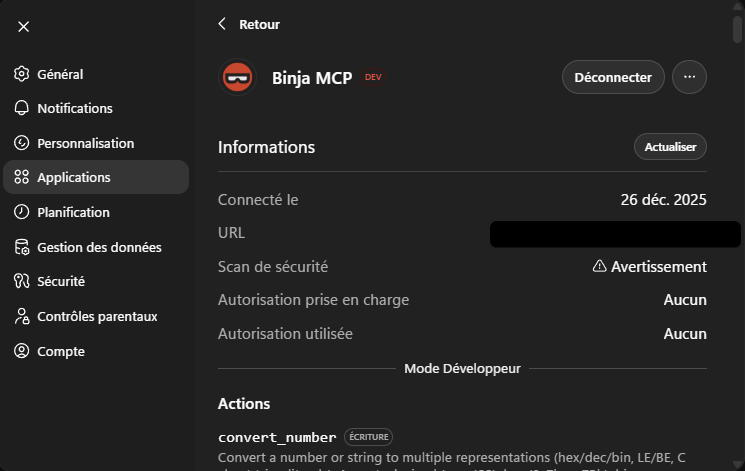
- As URL put
https://mcp.yourdomain.tld/mcp/ - Save the connector and normally everything should work.
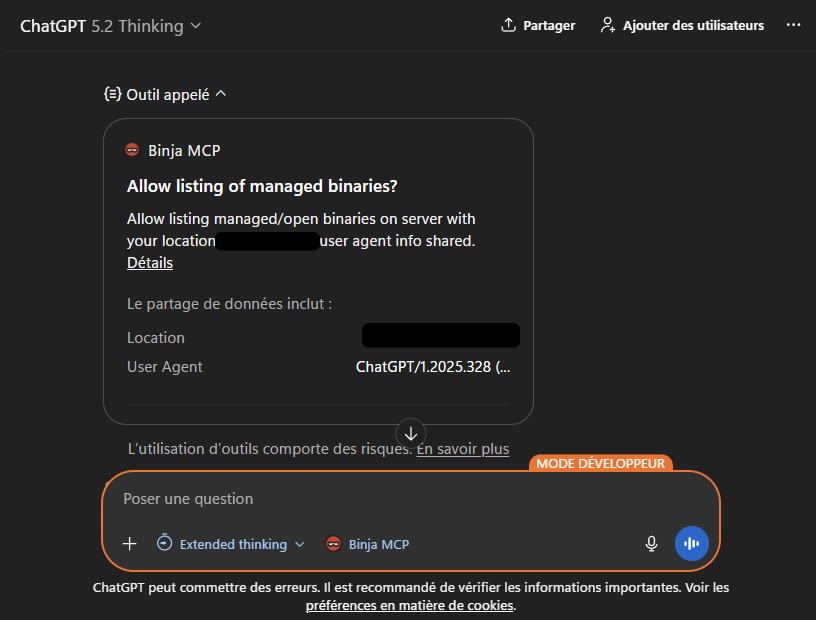
As you click save, you’ll see some logs appearing on your FastMCP terminal (ChatGPT accessing it):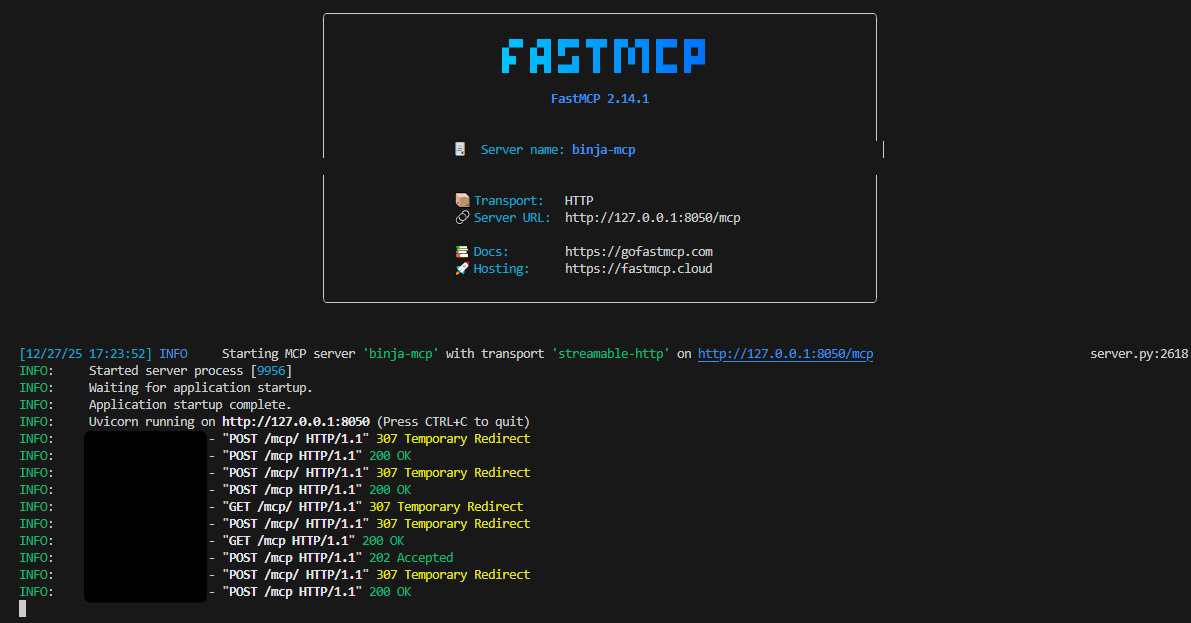
Using the connector#
Basically just type /the-name-of-your-connector and voilà: